Open OnDemand
Open OnDemand (OOD) provides a user-friendly web portal to Surrey’s HPC resources, ideal for beginners with minimal knowledge of Linux and SLURM scheduler commands. It provides graphical user interfaces for tools like MATLAB, JupyterLab, and VS Code, along with simplified file management and job handling. Users can submit and monitor jobs, access the shell, and run interactive apps, streamlining HPC access and usability.
To connect to CoSTAR Open OnDemand, visit https://costar-ood.surrey.ac.uk
You will need to have requested access to CoSTAR cluster to be able to log in. You can access the Open OnDemand webpage directly on campus or via VPN offcampus.
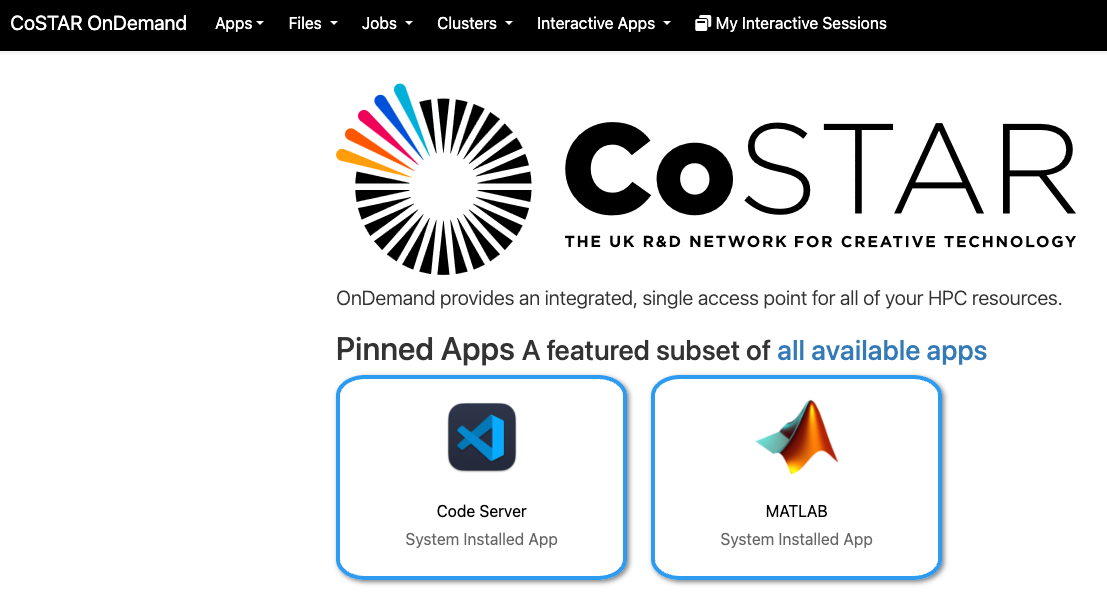
Screenshot of the CoSTAR Open OnDemand landing page.
After logging into OnDemand you will be presented with a landing page and a number of options.
Files
The File menu allows you to view and edit files in your home directory, scratch space, or other directories accessible through the cluster. It also notifies you if you are nearing your space quota allowance.
You can navigate to a specific location by selecting it from the dropdown menu. From there, you can download, upload, create, delete, open, and edit files. This makes OOD a convenient alternative to FTP and other command-line tools for transferring data between the cluster and your local machine.
Most file operations can be completed by selecting a file in the main window pane and using the options in the “…” (dots) menu.
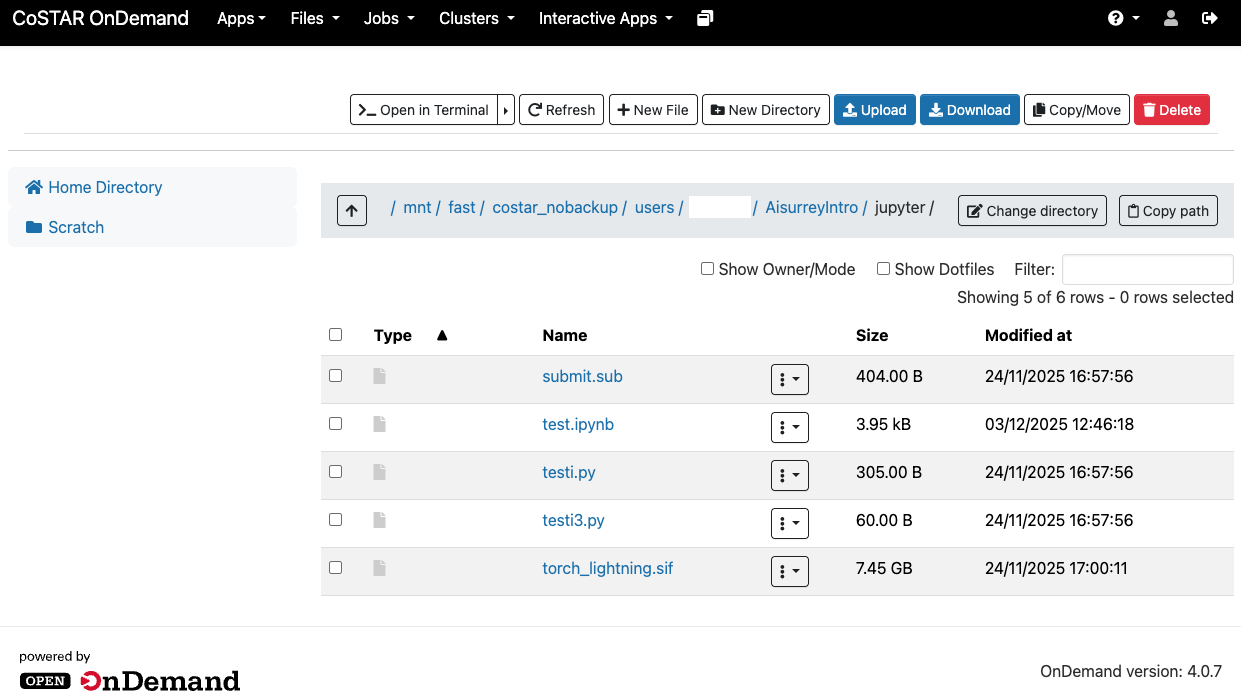
Screenshot of the ood-files menu page.
Clicking the Open in Terminal button while a file is selected will open a shell session in the current folder containing the selected file.
Jobs
The Jobs menu provides tools to monitor, create, edit, and schedule compute jobs.
The Active Jobs tab allows you to view and manage active jobs on the cluster. You can choose to display only your jobs or all jobs running on the cluster. Additionally, you have the option to cancel your own jobs directly from this tab.
The Job Composer tool enables you to create job submission scripts. You can: Start from scratch, Use a provided template, or Replicate a script from a previous job. For detailed guidance on using the Job Composer, refer to OSC’s job management video tutorial.
Clusters
The Clusters menu gives you:
🖥 Shell Access:
Open a Bash shell on the login node, which gives you the same command line interface as if you were logging in using SSH from your Linux/macOS/Windows machine.
📊 System Status:
View current node/queue status and job activity.
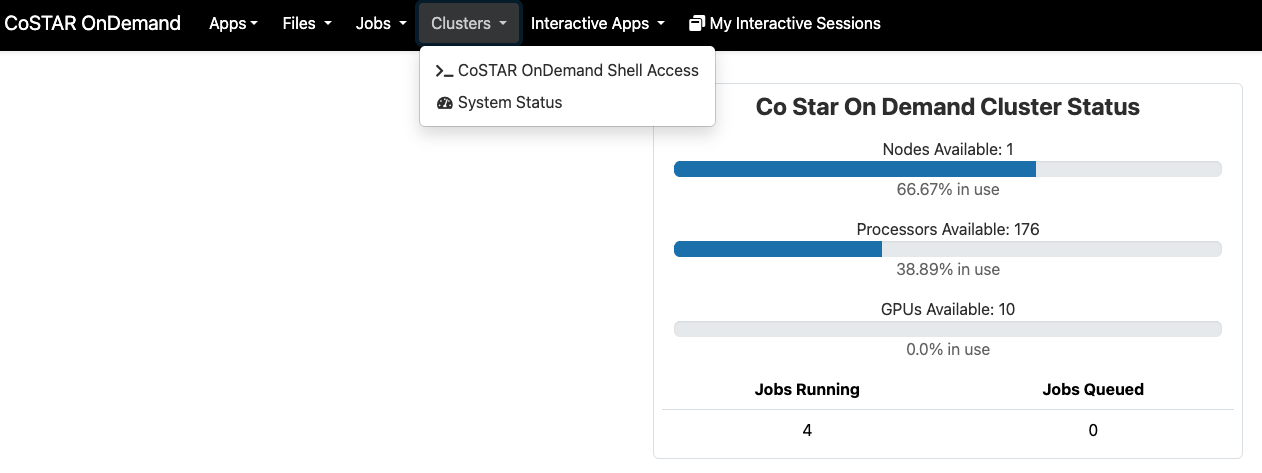
Open OnDemand cluster status view.
Caution
Never run compute-heavy jobs on the login node. Use it only for file management and submitting/monitoring jobs.
Interactive Apps
The Interactive Applications page lets you launch graphical tools through Open OnDemand. Currently available: Remote Desktop, MATLAB, JupyterLab, and VS Code (Code Server). More apps may be added based on user demand.
If you prefer a GUI over the terminal, these apps match the tools you already use on your local machine.
My Interactive Sessions
The My Interactive Sessions menu allows you to view and manage all your currently running interactive applications. From this menu, you can monitor details such as the node/core count, session status, time remaining, and the host name of the node running the session. By clicking on the node name under Host, you can directly open a shell into the node.
Attention
Closing the tab or browser does not stop an interactive session! it keeps consuming cluster resources. When you’re done, click Delete to terminate it immediately.
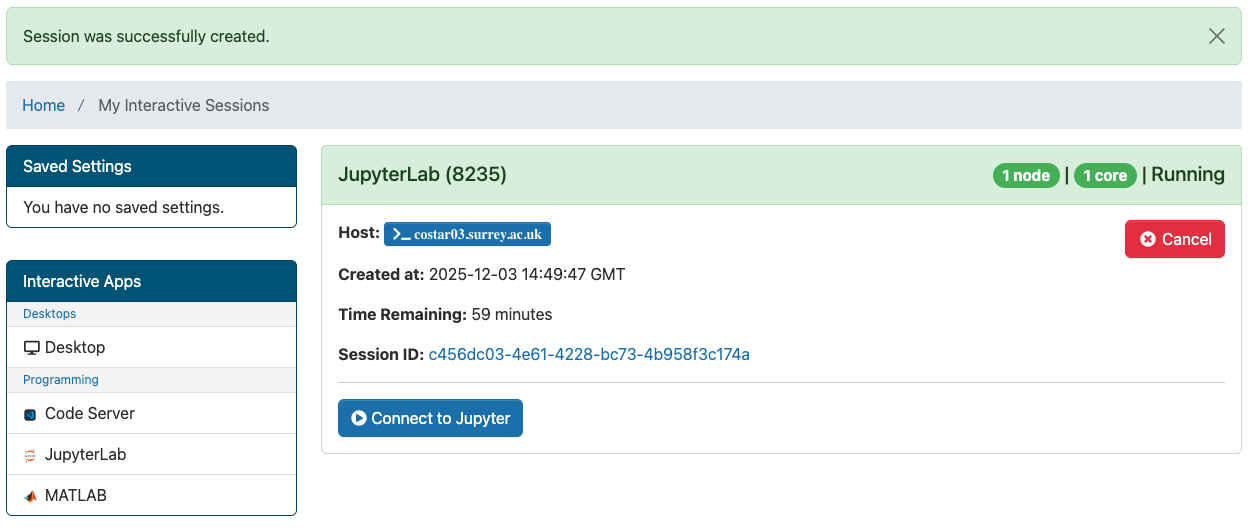
Screenshot of the OOD-myinteractive sessions.
Using custom Apptainer images
On CoSTAR, research software should normally be run inside containers where possible. This makes software environments more reproducible and avoids relying on locally installed packages on the cluster.
Some Open OnDemand interactive apps can be launched using a custom Apptainer image. This is useful when you want VS Code or JupyterLab to open directly inside the same software environment that you use for your batch jobs.
When using a custom image with an OOD app, make sure the image contains the tool needed by that app:
VS Code sessions need
code-serverinstalled in the image.JupyterLab sessions need
jupyterlabinstalled in the image.Any Python, CUDA, or project-specific packages should be installed inside the image.
The image should also make the intended environment available when the OOD app starts. For example, an image can create a Conda environment called apptenv and configure it in both %environment for container startup and /etc/profile for interactive shells.
Below are two example definition files for building custom Apptainer images to use with VS Code and JupyterLab in OOD interactive sessions:
The following definition file starts from a public Conda image, creates a Conda environment called apptenv, installs common Python packages, and installs code-server for use with the VS Code OOD app.
Bootstrap: docker
From: continuumio/anaconda3

%post
    apt-get update

    conda create -y --name apptenv python=3.12
    /opt/conda/bin/conda run -n apptenv python -m pip install --upgrade pip
    /opt/conda/bin/conda run -n apptenv python -m pip install numpy torch torchvision

    apt-get install -y wget
    wget https://github.com/coder/code-server/releases/download/v4.95.3/code-server_4.95.3_amd64.deb
    apt-get install -y ./code-server_4.95.3_amd64.deb
    rm code-server_4.95.3_amd64.deb

    echo "source /opt/conda/etc/profile.d/conda.sh && conda activate apptenv" >> /etc/profile
    apt-get clean
    rm -rf /var/lib/apt/lists/*

%environment
    source /opt/conda/etc/profile.d/conda.sh
    conda activate apptenv
When you start VS Code via OOD using this custom Apptainer image, the apptenv environment should be activated in the VS Code terminal.
Note
The first time you access the VS Code interactive app, you may need to install the Python extension to be able to run Python code. If you want to debug Python code, install the Python Debugger extension, or any other debugger extension you need.
For GPU-enabled sessions, you can verify that Python can see the allocated GPUs:
import os
import torch

print("CPU cores:", os.cpu_count())
print("GPUs:", torch.cuda.device_count())

for index in range(torch.cuda.device_count()):
    print(f"GPU {index}: {torch.cuda.get_device_name(index)}")
1. Launching Code Server with a custom Apptainer image:
The following screenshot illustrates launching a Code Server interactive app session using a custom Apptainer image stored in the user’s directory.
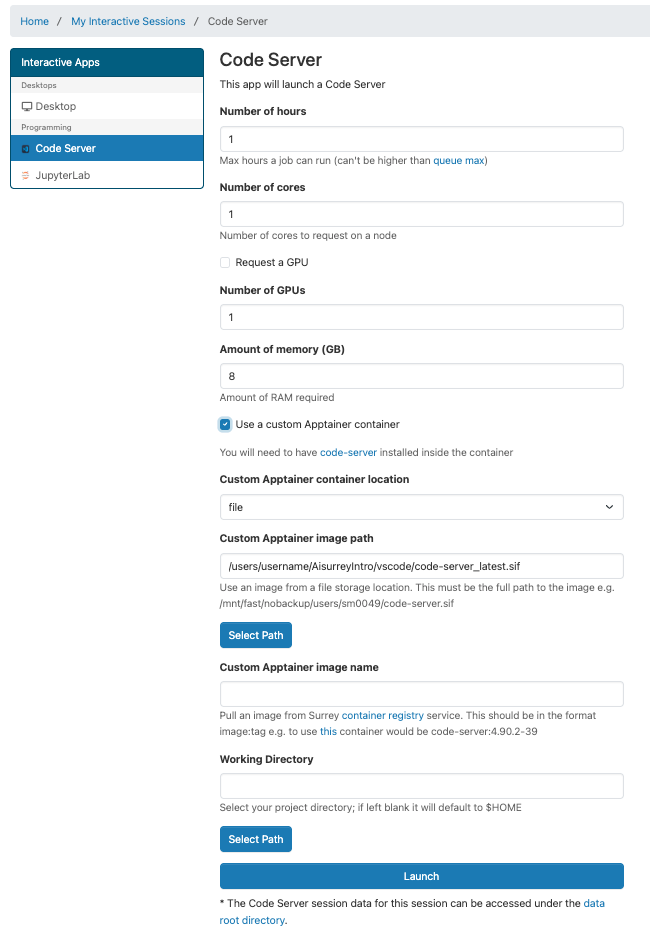
Code Server OOD form showing the custom Apptainer container options.
2. Running Python code inside the Apptainer image:
The following screenshot shows the GPU check running in a VS Code terminal inside the custom Apptainer image.
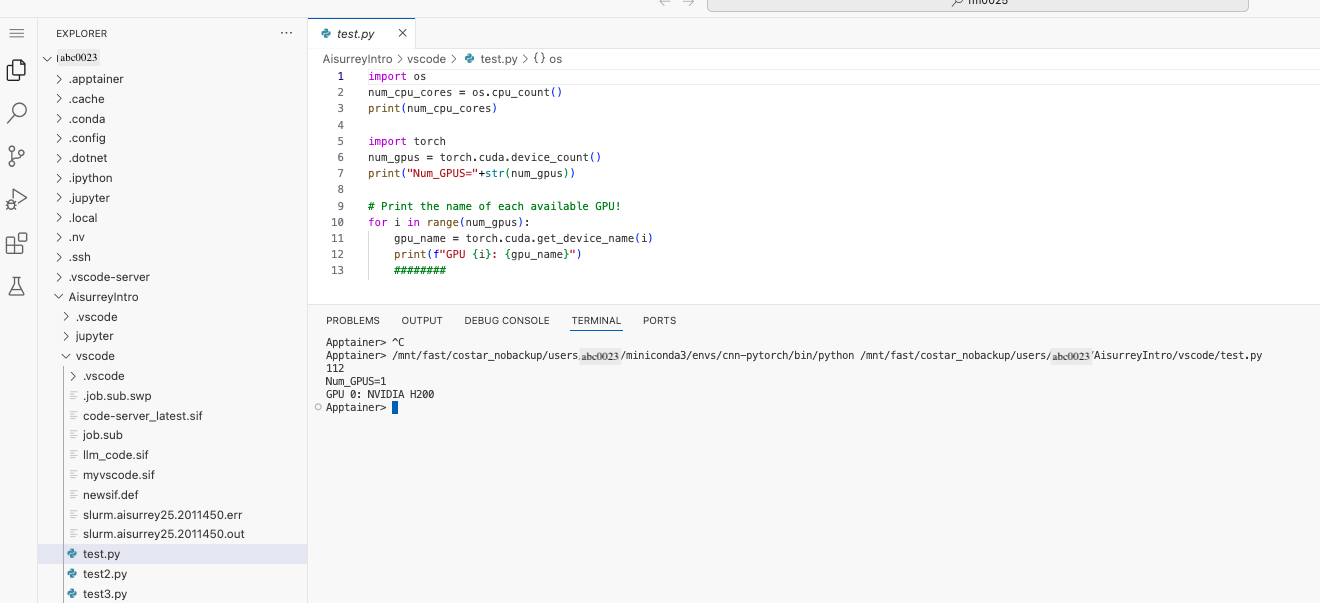
VS Code session showing Python code running inside the custom Apptainer image.
3. Debugging Python code inside the Apptainer image:
To debug Python code running inside the Apptainer image, install the Python Debugger extension in VS Code. When starting the debug run, use the run menu in the top-right corner of the editor and choose Python Debugger: Debug Python File.
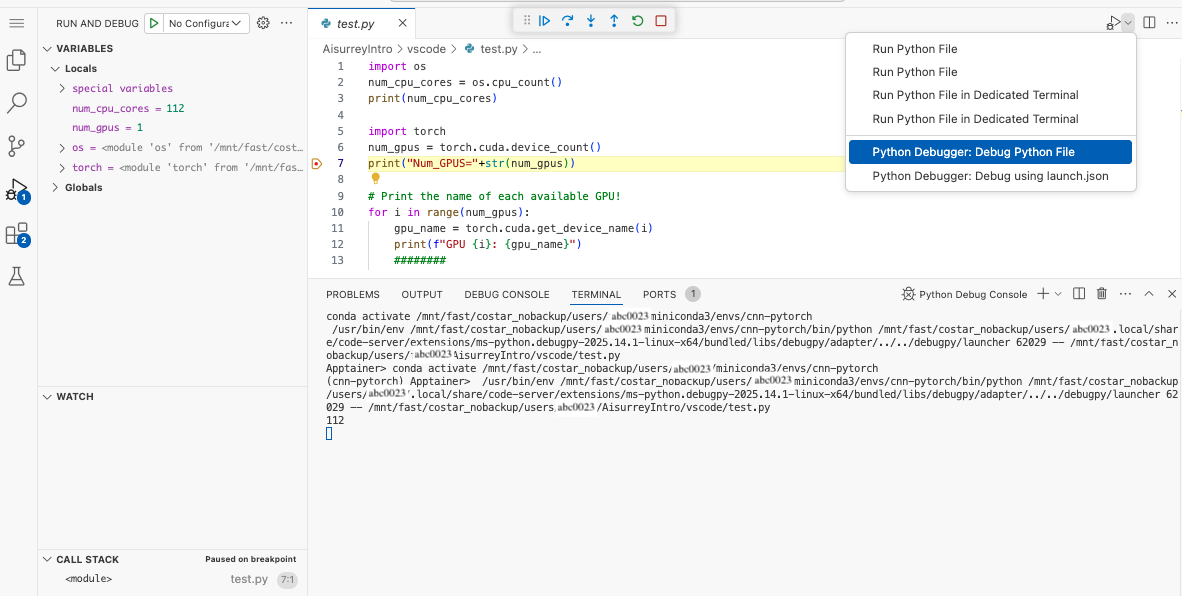
VS Code debugging a Python file inside the custom Apptainer image.
The following definition is similar to the Code Server image, but installs jupyterlab instead of code-server. This enables the OOD JupyterLab app to start inside the same custom Apptainer environment.
Bootstrap: docker
From: continuumio/anaconda3

%post
    apt-get update

    conda create -y --name apptenv python=3.12
    /opt/conda/bin/conda run -n apptenv python -m pip install --upgrade pip
    /opt/conda/bin/conda run -n apptenv python -m pip install numpy torch torchvision jupyterlab

    echo "source /opt/conda/etc/profile.d/conda.sh && conda activate apptenv" >> /etc/profile
    apt-get clean
    rm -rf /var/lib/apt/lists/*

%environment
    source /opt/conda/etc/profile.d/conda.sh
    conda activate apptenv
You can use the same Python snippet from the Code Server tab to verify GPU access in JupyterLab. To confirm that the apptenv Conda environment is active, open a terminal inside the JupyterLab session.
1. Launching JupyterLab with a custom Apptainer image:
The following screenshot illustrates launching a JupyterLab interactive app session using a custom Apptainer image stored in the user’s directory.
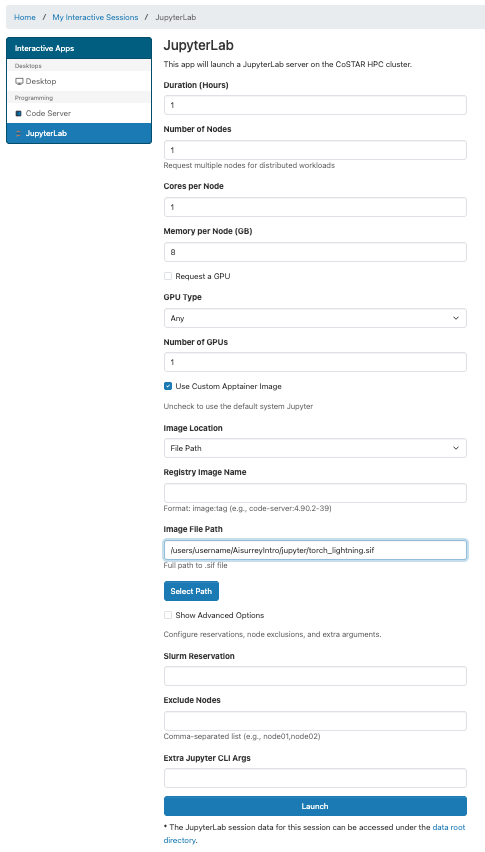
JupyterLab OOD form showing the custom Apptainer image options.
2. Running Python code inside the Apptainer image:
The following screenshot shows a JupyterLab notebook running inside the custom Apptainer image and detecting the allocated GPU.
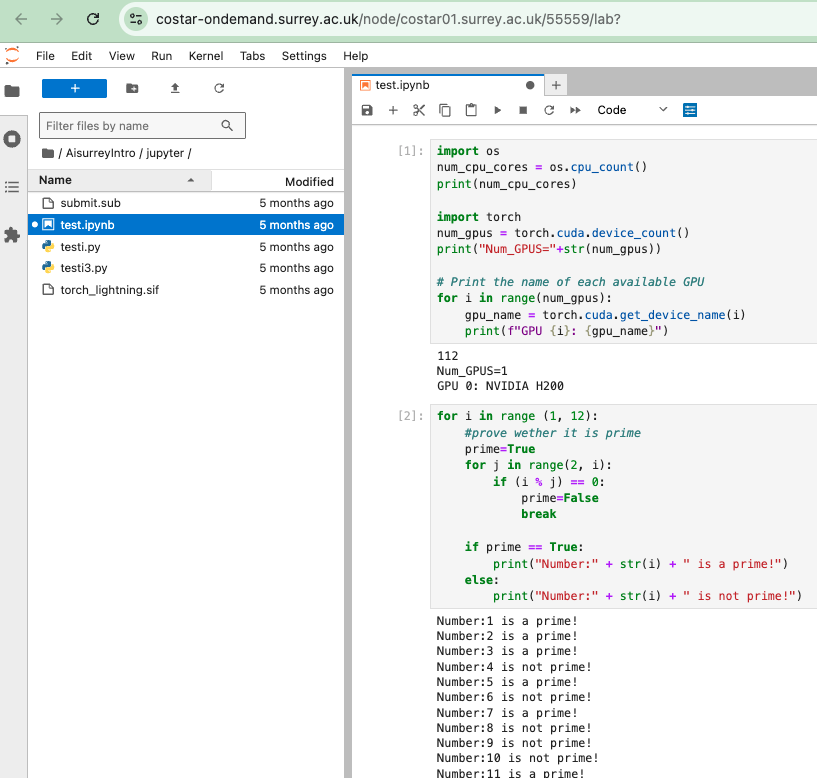
JupyterLab session showing Python code running inside the custom Apptainer image.